
Comprehensive Guide to Waterproofing in Construction: Structural Integrity and Polymer Cement Coating Techniques for Leak Prevention in Buildings
Waterproofing is generally divided into structural waterproofing in civil engineering and coating waterproofing during decoration.
Structural waterproofing refers to the waterproofing of floor slabs. Most of the waterproofing effectiveness relies on structural integrity. Before applying waterproof coatings, it is essential to conduct a water tightness test on the original structure, focusing on critical areas like wall roots, thresholds, floor drains, slab joints, and drainage pipe roots. Minor leaks can be repaired with sealing agents, while severe cases may require polyurethane injection.
Coating waterproofing involves polymer cement-based materials, which are flexible, corrosion-resistant, and crack-resistant. The key construction steps include:
- Base treatment
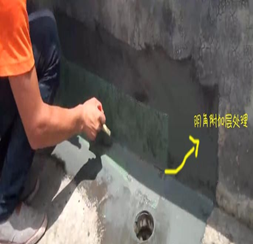
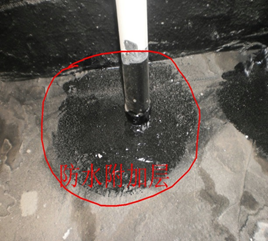
- Additional waterproof layer for details
- Applying the second coat
- Waterproof layer repair
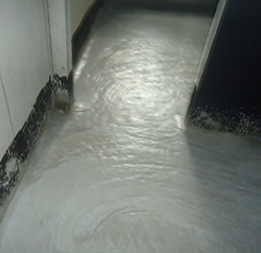
- Water accumulation test
- Laying cement mortar protection layer
- Final acceptance
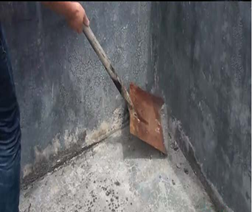
1. Before waterproofing, level and slope the ground. Repair gaps, cracks, or uneven surfaces with cement mortar. The base must be solid, flat, clean, and free of dust, oil, or debris. Internal and external corners should be rounded and smooth.
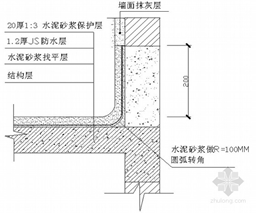
2. Apply additional waterproof layers to high-risk areas like wall roots, pipe roots, and floor drains. The coverage should be 300mm in diameter around pipes and 250mm horizontally and vertically at corners.
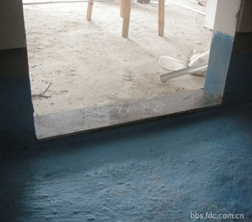
3. Install threshold water barriers using cement mortar mixed with waterproofing material. The barrier should be slightly narrower than the door frame and 2.5–3cm below the finished surface. After installation, apply waterproofing over a 200mm width around the barrier. Threshold stones must be wet-laid, with ends sealed using specialized mortar to form an L-shaped waterproof layer.
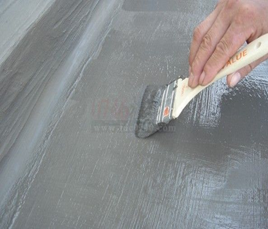
4. Apply waterproof coatings in layers, divided into two or more coats depending on design thickness. Each layer should be 0.5–0.6mm thick (first coat 0.6mm, subsequent coats 0.5mm). Ensure even application, and allow each layer to dry completely before applying the next. Coats should be applied perpendicularly, starting from walls to floors, moving inward to outward.
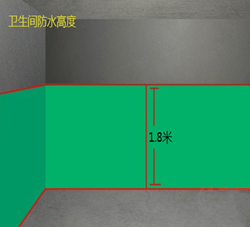
5. Standard wall waterproofing height must be 300mm, while shower areas require a minimum height of 1800mm.
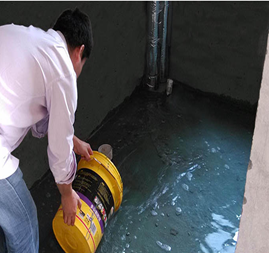
6. Conduct a 24-hour water accumulation test on the waterproof layer. After approval, lay a cement mortar protection layer to prevent damage during subsequent construction.
Common issues and solutions include: Failure to perform pre-construction water tests on structural surfaces can lead to leaks. Always conduct a 24-hour test, document issues, and ensure repairs before proceeding. Additionally, improper threshold barriers or unrounded corners may cause water seepage. Use rounded corners and multi-layer coating applications to enhance durability.